kenmore sewing machine 385 manual
Kenmore Sewing Machine 385 Manual: A Comprehensive Guide
This detailed manual offers comprehensive instructions for the Kenmore 385 sewing machine, covering safety, operation, maintenance, and troubleshooting for optimal performance.
The Kenmore 385 sewing machine is a popular household model known for its reliability and versatility. This machine, available in various model numbers like 385.17641 and 385.19005, is designed for a wide range of sewing projects, from simple repairs to more complex creations.
This manual serves as a complete guide to understanding and utilizing all the features of your Kenmore 385. It provides step-by-step instructions, safety precautions, and troubleshooting tips to ensure a smooth and enjoyable sewing experience. Whether you’re a beginner or an experienced seamstress, this resource will help you unlock the full potential of your machine.
Understanding the Model Numbers (385.17641, 385.19005, etc.)
Kenmore 385 sewing machines are identified by various model numbers, such as 385.17641, 385.19005, and others. While the core functionality remains consistent across these models, slight variations in included accessories or minor feature adjustments may exist.
Generally, these numbers indicate manufacturing dates or specific retailer configurations. This manual aims to cover the majority of 385 series machines; however, always refer to any supplemental documentation included with your specific model for precise details. Understanding your model number can be helpful when ordering replacement parts.
Safety Instructions
Prioritize safety when operating your Kenmore 385 sewing machine. This machine is designed for household use only. Always disconnect the power supply before threading, changing the needle, or performing maintenance. Keep fingers away from moving parts, particularly the needle and presser foot.
Never operate the machine if damaged, and avoid using it in damp environments. Supervise children when near the machine. Refer to the detailed safety precautions within this manual for comprehensive guidance on safe operation and preventing potential hazards.
Important Safety Precautions
Always unplug the Kenmore 385 before making adjustments or changing parts. Never force the machine beyond its intended speed. Keep the machine clean and free from dust and lint accumulation to prevent fire hazards. Avoid using damaged cords or plugs, and never operate with a damaged power supply.
Ensure proper ventilation during operation. Do not insert hands into the machine while it’s running. Regularly inspect all parts for wear and tear, and replace as needed. Follow all instructions carefully to ensure safe operation.
Electrical Safety Guidelines
Always ensure the power supply matches the machine’s voltage requirements. Never operate the Kenmore 385 with a damaged power cord or plug. Avoid using extension cords if possible; if necessary, use a heavy-duty cord rated for the machine’s amperage.
Do not expose the machine to moisture or operate it with wet hands. Regularly inspect the plug and cord for damage. Disconnect the machine from the power source before cleaning or servicing. Grounding is essential for electrical safety.
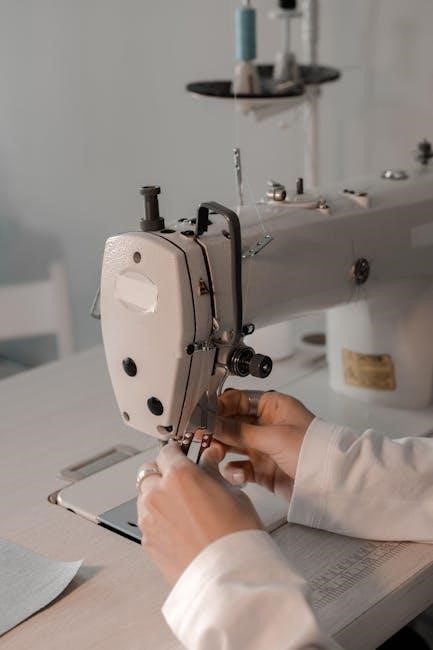
Machine Components Overview
The Kenmore 385 features a robust construction with key components for efficient sewing. These include the power switch, handwheel, needle clamp, presser foot, presser foot lever, feed dogs, bobbin winder, tension dials, and stitch selection dial. Understanding each part’s function is crucial.
Familiarize yourself with the needle and presser foot mechanisms, as they work in tandem to form stitches. The machine also includes a spool pin, thread guides, and a bobbin case for smooth operation.
Identifying Key Parts
Locate the essential components for successful operation. The handwheel controls needle movement, while the presser foot lever raises and lowers the foot. The needle clamp secures the needle, and the feed dogs advance fabric.
Identify the bobbin winder, tension dials, and stitch selection dial. The spool pin holds the thread, and thread guides direct it. Knowing these parts ensures proper threading and stitch formation for various sewing projects.
Needle and Presser Foot Mechanisms
Understanding these mechanisms is crucial for smooth sewing. The needle’s up-and-down motion, driven by the machine, creates stitches. The presser foot maintains fabric pressure, ensuring consistent feeding. Adjust the presser foot pressure dial for different fabric weights.
Proper needle insertion into the clamp is vital. Select the correct needle type for your fabric. Ensure the presser foot is securely attached before sewing. These mechanisms work in harmony for accurate and reliable stitch formation.
Setting Up Your Kenmore 385
Preparing your Kenmore 385 for sewing involves a few key steps. First, ensure the power switch is off. Then, carefully thread the machine following the numbered diagram in the manual. Next, wind the bobbin evenly, ensuring it isn’t too tight or loose.
Insert the bobbin correctly into the bobbin case. Attach the appropriate presser foot for your chosen stitch. Finally, select your desired stitch settings before beginning your project.
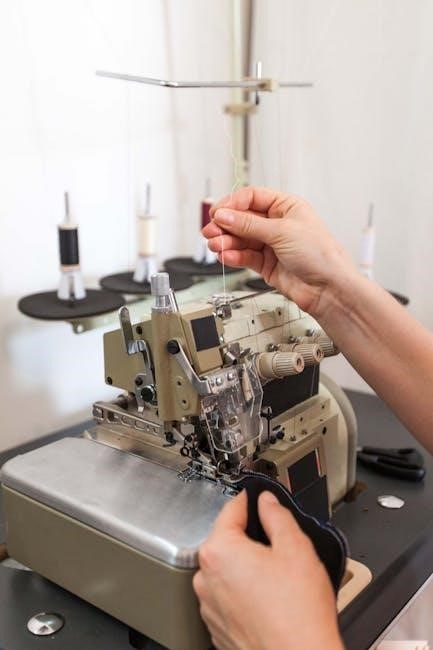
Threading the Machine
Proper threading is crucial for smooth sewing. Begin by raising the presser foot and the needle to its highest position. Guide the thread from the spool, through the first thread guide, and around the tension discs. Next, lead the thread through the take-up lever and down to the needle clamp.
Ensure the thread is securely inserted into the needle’s eye, traveling from front to back. Refer to the detailed threading diagram in your manual for visual assistance.
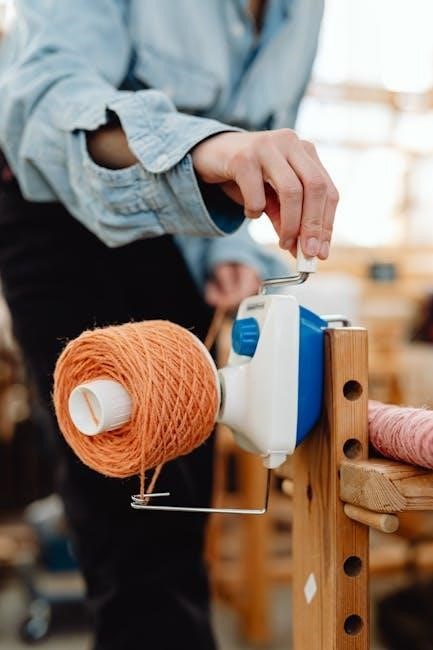
Winding the Bobbin
Correct bobbin winding ensures consistent stitch quality. Place the spool of thread on the spool pin and guide the thread through the bobbin winding tension disc. Attach the empty bobbin to the bobbin winder spindle, ensuring it clicks into place securely.
Engage the bobbin winder by pushing it to the right. Press the foot pedal gently to start winding; the machine will stop automatically when full.
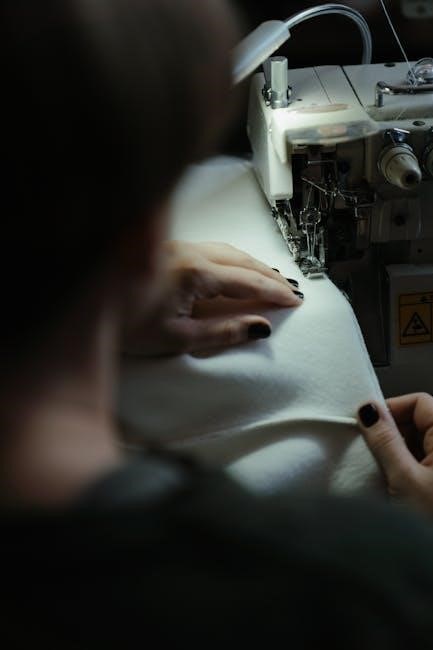
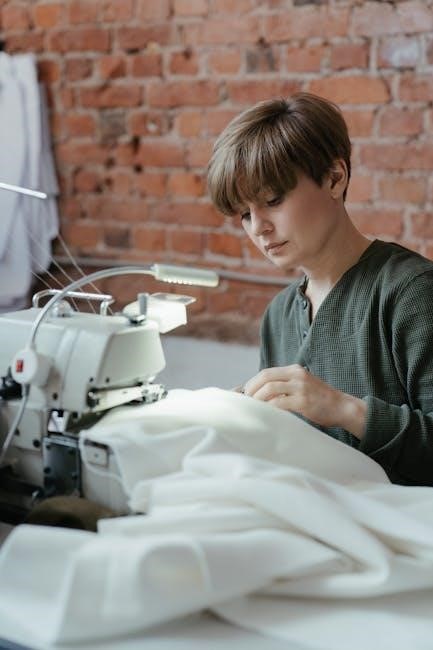
Basic Sewing Operations
Mastering fundamental techniques unlocks the Kenmore 385’s potential. Begin with straight stitching, a versatile skill for seams and topstitching. Ensure proper threading and tension for even stitches. Next, explore zigzag stitching, ideal for finishing raw edges and creating decorative effects.
Practice on scrap fabric to adjust stitch length and width before working on your project. Consistent pressure on the foot pedal is key for smooth sewing.
Straight Stitching
The foundation of sewing, a straight stitch creates durable seams. Select the straight stitch setting on your Kenmore 385. Thread the machine correctly and ensure the presser foot is lowered. Begin by gently pressing the foot pedal, guiding the fabric smoothly; Maintain a consistent speed for uniform stitch length.
Practice straight lines on scrap fabric. Adjust stitch length based on fabric weight; shorter for delicate fabrics, longer for heavier ones.
Zigzag Stitching
The versatile zigzag stitch offers flexibility for various applications. Select the zigzag stitch setting on your Kenmore 385, adjusting width and length as needed. A narrower width is ideal for reinforcing edges, while a wider width creates decorative effects. Practice on scrap fabric to understand the stitch’s capabilities.
Zigzag stitches prevent fabric fraying and are excellent for stretch fabrics. Experiment with different settings to achieve desired results.
Stitch Selection and Adjustment
Your Kenmore 385 offers a variety of stitch options, selected via the stitch dial. Understanding stitch length and width is crucial for achieving desired results. Longer stitch lengths are suitable for heavier fabrics, while shorter lengths work best for delicate materials.
Adjusting the stitch width alters the zigzag’s breadth. Proper tension ensures balanced stitches; imbalances can cause looping or puckering. Experiment with settings on scrap fabric before starting your project.
Understanding Stitch Length and Width
Stitch length, measured in millimeters, dictates the distance between each stitch. A shorter length (e.g., 2.0mm) is ideal for lightweight fabrics and delicate seams, providing increased strength. Conversely, a longer length (e.g., 4.0mm) suits heavier materials like denim, creating a more durable, yet looser, stitch.
Stitch width controls the zigzag’s breadth, impacting fabric coverage and decorative potential. Wider widths are perfect for finishing raw edges, while narrower widths create subtle embellishments.
Adjusting Tension
Proper tension is crucial for balanced stitches; imbalances cause looping or puckering. The Kenmore 385 features a tension dial, typically numbered. Higher numbers increase upper thread tension, pulling the fabric tighter. Lower numbers loosen it. Begin with the default setting (usually ‘4’ or ‘5’).
Test stitch on scrap fabric. If loops appear underneath, increase upper tension. If puckering occurs, decrease it. Adjust incrementally, retesting after each change, until a balanced stitch is achieved.
Troubleshooting Common Issues
Encountering problems? This section addresses frequent Kenmore 385 issues. Thread breakage often stems from incorrect threading, a dull needle, or improper tension. Skipped stitches can indicate a bent needle, incorrect needle size for the fabric, or timing issues. Always re-thread the machine and replace the needle first.
If problems persist, consult the manual’s diagrams and ensure the bobbin is correctly inserted. Consistent issues may require professional servicing.
Thread Breakage Problems
Frequent thread breaks indicate several potential issues. First, verify correct threading following the manual’s diagrams; ensure the thread is seated properly in all guides and the tension discs. A dull or bent needle is a common culprit – replace it with a new, appropriate size. Incorrect tension, too tight or too loose, also causes breaks.
Finally, incompatible thread for the fabric or a poorly wound bobbin can contribute to the problem.
Skipped Stitches and Solutions
Skipped stitches often point to needle issues. Ensure the needle is correctly inserted, with the flat side facing the correct direction, as detailed in the manual. A bent or damaged needle must be replaced. Verify you’re using the correct needle type and size for your fabric weight.
Incorrect threading or improper tension settings can also cause skipped stitches. Re-thread the machine and adjust the tension dial accordingly.
Maintenance and Cleaning
Regular maintenance ensures your Kenmore 385 operates smoothly. Always unplug the machine before cleaning! Remove lint buildup from the bobbin area and feed dogs using a brush. Wipe down exterior surfaces with a soft, dry cloth. Avoid using liquid cleaners directly on the machine.
Periodically, a drop of sewing machine oil on key moving parts, as indicated in the manual, will maintain optimal performance and prevent wear.
Regular Cleaning Procedures
Consistent cleaning is vital for a long-lasting Kenmore 385. Begin by unplugging the machine. Use the brush accessory to remove lint from the bobbin case, shuttle hook, and feed dog area after each use. A small vacuum attachment can also be helpful. Wipe down the exterior with a soft, dry cloth to remove dust.
Inspect the needle plate for thread fragments and clean as needed. Avoid using sprays or liquids directly on the machine’s internal components.
Lubrication Guidelines
Proper lubrication ensures smooth operation of your Kenmore 385. Generally, this machine requires minimal oiling. Apply a drop of sewing machine oil to the bobbin case hinge and the shuttle hook race after every bobbin change or approximately every eight hours of use.
Avoid over-oiling, as excess oil attracts lint. Use only sewing machine oil; other lubricants can damage the internal components. Wipe away any excess oil immediately with a clean, soft cloth.
Advanced Features (If Applicable)
The Kenmore 385 offers convenient features for diverse sewing projects. It includes a four-step buttonhole function, allowing for consistent and professional-looking buttonholes. Additionally, the machine facilitates basic zipper insertion, with a dedicated zipper foot available for precise stitching along the zipper tape.
These features expand the machine’s capabilities beyond basic straight and zigzag stitching, enabling more complex garment construction and creative sewing endeavors.
Buttonhole Sewing
The Kenmore 385 simplifies buttonhole creation with its four-step process. Begin by selecting the buttonhole stitch and positioning the fabric. The machine automatically sews the first side, then pivots, stitches the second side, and finishes with a bartack for secure closure.
Ensure proper buttonhole stabilizer usage for optimal results. Practice on scrap fabric to adjust settings for different button sizes, achieving consistently neat and durable buttonholes.
Zipper Insertion Techniques
The Kenmore 385 offers several zipper insertion methods, including the standard zipper foot technique. Attach the zipper foot and select a straight stitch. Position the zipper teeth evenly under the foot, carefully sewing along both sides.
For invisible zippers, utilize the invisible zipper foot, guiding the zipper coils closely to the foot’s groove. Practice on scrap fabric to master alignment and achieve professional-looking zipper applications.
Needle and Presser Foot Guide
Selecting the correct needle and presser foot is crucial for successful sewing with your Kenmore 385. Universal needles suit most fabrics, while ballpoint needles are ideal for knits. Denim needles handle heavier materials effectively.
Utilize the standard presser foot for general sewing, the zipper foot for close-to-edge stitching, and the buttonhole foot for precise buttonhole creation. Experiment with different combinations to achieve optimal results on various projects.
Choosing the Right Needle
Selecting the appropriate needle significantly impacts stitch quality and prevents fabric damage on your Kenmore 385. Universal needles (size 80/12, 90/14) work well for woven fabrics. Ballpoint needles (size 75/11, 90/14) are essential for knits, preventing skipped stitches.
Denim or jeans needles (size 90/14, 100/16) handle heavier fabrics. Sharps needles are best for tightly woven materials. Always replace needles frequently for consistent, professional results.
Presser Foot Applications
Your Kenmore 385’s versatility expands with the correct presser foot selection. The standard foot suits general sewing. A zipper foot facilitates close-to-edge stitching. A buttonhole foot automates buttonhole creation. Utilize a satin stitch foot for decorative stitches and appliqué.
A blind hem foot creates invisible hems. A rolled hem foot produces delicate, narrow hems. Experimenting with different feet unlocks your machine’s full potential, enhancing project outcomes and sewing precision.
Kenmore 385 Parts Diagram
A detailed parts diagram is crucial for identifying components during maintenance or repair. This visual guide illustrates the location of each part, from the needle and presser foot to internal mechanisms like the bobbin case and timing belt.
Referencing the diagram simplifies troubleshooting and ensures correct part replacement. It’s an invaluable resource for understanding the machine’s construction and facilitating successful repairs, extending its lifespan and functionality.
Finding Replacement Parts
Locating replacement parts for your Kenmore 385 is essential for maintaining its functionality. Online retailers specializing in sewing machine parts often carry components compatible with this model. Utilizing the parts diagram is vital when ordering, ensuring accurate identification.
Check with Kenmore’s customer service or authorized repair centers for genuine parts. Providing the model number (e.g., 385.17641) streamlines the process, guaranteeing compatibility and a proper fit for lasting repairs.
Downloading the Kenmore 385 Manual
Accessing a digital copy of the Kenmore 385 manual offers convenient troubleshooting and reference; Several online archives and sewing machine enthusiast websites host downloadable versions of the user manual. Searching specifically for “Kenmore 385.17641 manual” or similar model numbers yields results.
Ensure the downloaded file is from a reputable source to avoid malware. Having a digital manual readily available provides quick access to instructions and diagrams, aiding in machine maintenance and repair.
Frequently Asked Questions (FAQ)
Common questions regarding the Kenmore 385 often involve threading issues, bobbin winding, and stitch selection. Users frequently inquire about needle types suitable for various fabrics and troubleshooting skipped stitches. Another frequent concern is locating replacement parts for older models.
Understanding tension adjustments and addressing thread breakage are also popular topics. Online sewing communities provide forums where users share solutions and advice specific to the Kenmore 385.
Resources and Support
For direct assistance, Kenmore customer service offers support via phone and potentially online chat. Numerous online sewing communities and forums are dedicated to vintage sewing machines, including the Kenmore 385, providing a platform for users to exchange tips and troubleshooting advice.
Websites archiving old manuals, like the Wayback Machine, can be invaluable for locating lost documentation. Exploring these resources ensures continued usability of your machine.
Kenmore Customer Service Contact Information
Unfortunately, direct contact information specifically for vintage Kenmore sewing machine support like the 385 model is often limited. Kenmore’s current customer service primarily focuses on newer appliances.
However, you can attempt to reach them through the Sears customer support portal, as Kenmore was historically a Sears brand. Online searches for “Kenmore customer service” will yield the most current contact options. Expect potentially longer wait times or redirection.
Online Sewing Communities and Forums
Numerous online sewing communities and forums offer invaluable support for Kenmore 385 owners. Websites like SewingOnline and Reddit’s r/sewing frequently host discussions about vintage machines, including troubleshooting and repair advice.
These platforms allow you to connect with experienced users who may have encountered similar issues and can share helpful tips, parts sources, and even scanned manuals. Searching these forums specifically for “Kenmore 385” will yield relevant results.
Warranty Information
Due to the age of the Kenmore 385 sewing machine, the original manufacturer’s warranty has likely expired. Kenmore warranties typically covered defects in materials and workmanship for a limited period, often one year from the date of purchase.
However, some retailers may offer extended warranties on refurbished or reconditioned machines. Check your purchase documentation for any applicable warranty details. Otherwise, repairs and parts replacement are generally the owner’s responsibility.
Lost your Kenmore 385 sewing machine manual? No worries! Download a free, easy-to-use PDF version right here. Get sewing quickly with our helpful guide!