steelcase cubicle assembly instructions

Steelcase Cubicle Assembly Instructions: A Comprehensive Guide
Embark on a seamless workspace transformation! This guide details assembling your Steelcase cubicle, referencing resources like the Series 2 chair assembly for related techniques.
Understanding Your Steelcase Cubicle Components
Before you begin, familiarize yourself with the core elements of your Steelcase cubicle system. These typically include vertical panels forming the walls, horizontal work surfaces acting as your desk, and supporting beams providing structural integrity.
Steelcase designs often incorporate privacy panels for focused work and acoustic panels to minimize noise disruption. Understanding how these components interact is crucial for a smooth assembly.
Consider the modular nature of Steelcase systems; components are designed to connect and reconfigure. Referencing assembly guides, like those for the Series 2 chair, can illustrate connection principles. Identifying each part before starting saves time and frustration. A successful build relies on recognizing the function of each element within the overall structure.
Identifying Parts and Hardware
Accurate part identification is paramount for efficient assembly. Steelcase cubicles utilize a variety of hardware, including bolts, screws, connectors, and clips – often specific to each connection point. Lay out all components and compare them against the parts list included with your shipment.
Pay close attention to subtle differences in screw sizes and connector types. Misusing hardware can damage panels or compromise structural stability.
The Series 2 chair assembly guide highlights the importance of correct hardware application; this principle extends to cubicle construction. Categorize hardware into labeled containers to streamline the process. Double-check quantities against the parts list. A thorough inventory prevents mid-assembly delays searching for missing pieces, ensuring a frustration-free build.
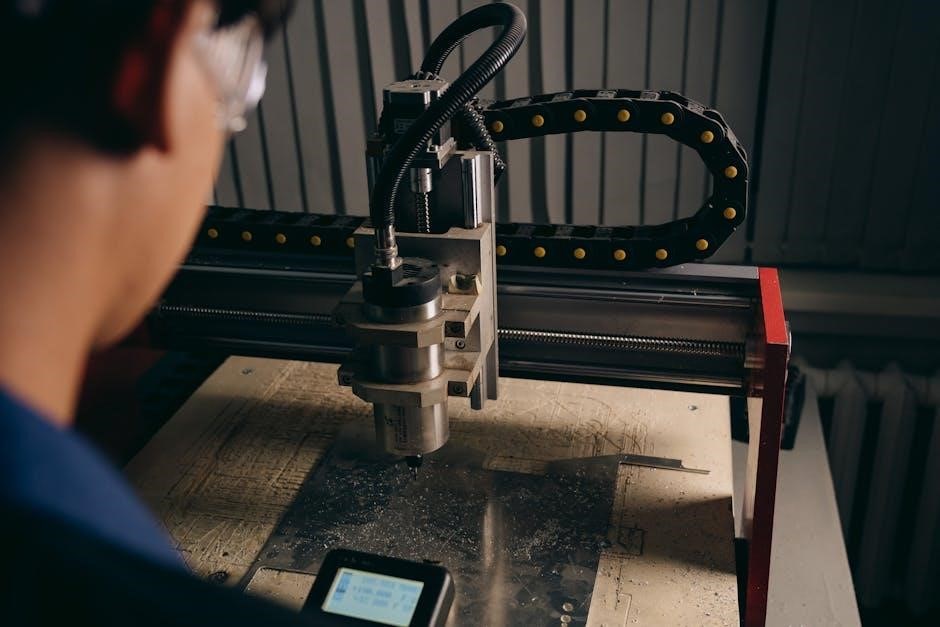
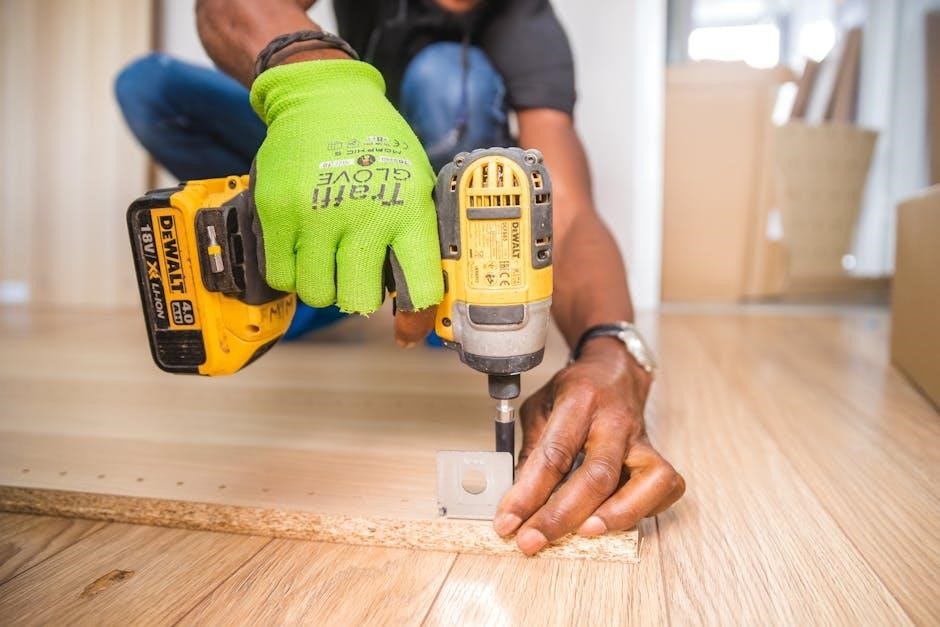
Tools Required for Assembly
Proper tools significantly ease Steelcase cubicle assembly and ensure a secure, lasting structure. A standard Phillips head screwdriver is essential, both manual and powered with adjustable clutch settings to prevent over-tightening. A flathead screwdriver may also be needed for certain connectors.
A rubber mallet proves invaluable for gently tapping panels into place without causing damage. A level is crucial for ensuring vertical panels are plumb and work surfaces are horizontally aligned. Measuring tape aids in accurate placement and spacing.
Consider using a power drill with appropriate bits for faster screw insertion, but exercise caution. Like the Series 2 chair assembly, careful tool selection prevents stripping screws or damaging components. Safety glasses are recommended to protect against debris. Having these tools prepared beforehand streamlines the entire process.
Assembling the Cubicle Frame
Begin constructing the cubicle’s foundational structure! Carefully connect the core components, establishing a stable base for panels and work surfaces, ensuring alignment.
Attaching the Vertical Panels
Securely fasten the vertical panels to the assembled frame, initiating the cubicle’s enclosure. Begin by aligning the panel’s mounting points with those on the frame – typically involving brackets and specialized hardware. Ensure a flush fit before tightening any fasteners; misaligned panels can compromise stability and aesthetics.
Utilize the provided tools to firmly attach each panel, checking for plumbness as you progress. Consistent leveling is crucial for a professional finish. Pay close attention to any designated orientation markings on the panels themselves. Some panels may feature integrated cable management channels, so consider their placement during installation. Double-check all connections for tightness, preventing future shifting or detachment. A properly installed vertical panel system forms the backbone of your workspace’s privacy and organization.
Connecting Horizontal Work Surfaces
Carefully position the horizontal work surfaces onto the assembled cubicle frame, establishing the primary work area. Align the work surface supports with the corresponding receivers on the frame, ensuring a level and stable platform. Utilize the designated hardware – often involving bolts and locking mechanisms – to securely fasten the surface.
Prioritize even distribution of weight during attachment to prevent stress points. Double-check that all fasteners are tightened to the manufacturer’s specifications. Consider the desired ergonomic height and adjust the supports accordingly before final tightening. Some work surfaces may feature pre-drilled holes for accessories; plan their placement now. A robustly connected work surface is fundamental to a functional and comfortable workspace, providing a solid foundation for daily tasks.
Installing Support Beams
Reinforce the cubicle structure by strategically installing support beams. These beams, typically metal, provide crucial stability and weight distribution, particularly for larger work surfaces or higher panel configurations. Locate the designated slots or mounting points on the vertical panels and frame components.
Secure the beams using the appropriate bolts, screws, or locking pins provided in the hardware kit. Ensure proper alignment before fully tightening, as misalignment can compromise structural integrity. Pay attention to the orientation of the beams; some may be designed for specific load-bearing directions. Properly installed support beams prevent wobbling, enhance durability, and contribute to a safe and reliable workspace. Regularly inspect these connections for tightness over time.

Work Surface and Panel Installation
Securely mount the work surface and panels for a functional, private workspace. This stage brings the cubicle to life, defining its form and usability.
Securing the Work Surface to the Frame

Attaching the work surface requires precision and the correct hardware. Begin by carefully positioning the work surface onto the assembled cubicle frame, ensuring proper alignment with pre-drilled holes. Utilize the provided bolts, screws, and washers – referencing the parts list to confirm correct sizing.
Employ a screwdriver or Allen wrench (depending on the hardware) to tighten the fasteners securely, but avoid over-tightening, which could damage the work surface or frame. Work in a crosswise pattern, gradually tightening each fastener to distribute pressure evenly;
Double-check the stability of the work surface after initial tightening. If any wobble exists, re-examine the connections and adjust as needed. A firmly secured work surface is crucial for a safe and productive workspace. Consider using a level to ensure a perfectly flat surface.
Attaching Privacy Panels
Enhance your workspace with added privacy using the provided panels. Carefully align the privacy panels with the designated slots or mounting points on the cubicle frame. These panels typically attach using clips, screws, or a combination of both – consult your parts list for specifics.
Ensure the panels are oriented correctly, with the finished side facing outwards. Gently press or screw the panels into place, verifying a snug and secure fit. Avoid forcing the panels, as this could cause damage to the panel or the frame.
Once attached, test the stability of each panel. If any panel feels loose, re-examine the attachment points and tighten or adjust as necessary. Properly installed privacy panels contribute to a more focused and comfortable work environment.
Installing Acoustic Panels
Reduce noise and improve focus with acoustic panel installation. These panels, designed to absorb sound, typically attach to the interior surfaces of the cubicle panels. Locate the designated mounting points – often fabric-covered areas with pre-installed clips or Velcro strips.
Carefully align the acoustic panel with the mounting surface, ensuring even distribution. Press firmly to secure the panel, activating the clips or Velcro. For panels requiring screws, use the appropriate hardware and avoid over-tightening.
Inspect each panel for proper adhesion and coverage. Gaps or loose edges can diminish acoustic performance. Strategically placed acoustic panels create a quieter, more productive workspace, enhancing concentration and minimizing distractions.
Electrical and Data Connections
Power up and connect! This section guides safe cable routing, port installation, and effective cable management within your newly assembled Steelcase cubicle system.
Running Cables Through the Cubicle
Strategic cable routing is crucial for a clean and functional workspace. Steelcase cubicles often feature designated pathways – typically within the panel frames or under the work surface – designed to conceal and protect electrical and data cables. Begin by identifying these channels before connecting any devices.
Carefully feed cables through these pathways, avoiding sharp bends or excessive tension that could damage the wiring. Utilize cable ties or Velcro straps to bundle cables neatly and prevent them from dangling or obstructing movement. Remember to leave some slack in the cables to accommodate adjustments to the cubicle components or future additions.
Prioritize safety by ensuring cables do not create tripping hazards or interfere with access to emergency exits. Consider using cable management trays or raceways to further organize and conceal cables, especially in high-density areas. Proper cable management not only enhances aesthetics but also minimizes the risk of accidental disconnections or damage.
Installing Power and Data Ports
Securely integrating power and data access is vital for a productive workspace. Steelcase cubicles typically accommodate power and data ports either directly within the work surface or through dedicated under-desk units. Ensure the chosen location aligns with your workstation’s needs and local electrical codes.
Before installation, verify the power source is disconnected. Carefully mount the ports according to the manufacturer’s instructions, using appropriate screws and ensuring a flush fit. Connect the power and data cables, double-checking polarity and secure connections.
Test each port thoroughly with a device to confirm functionality before concealing the wiring. Consider using grommets or covers to protect unused ports from dust and debris. Always prioritize electrical safety and consult a qualified electrician if you are unsure about any aspect of the installation process.
Cable Management Solutions
Maintaining a tidy workspace is crucial, and effective cable management is key; Steelcase cubicles offer various solutions, including integrated cable trays, vertical cable pathways, and under-desk cable raceways. Utilize these features to conceal and organize power cords, data cables, and other wiring.
Begin by bundling cables together using Velcro straps or zip ties, avoiding excessive tension. Route cables through the designated pathways, ensuring they don’t obstruct movement or create tripping hazards. Consider using cable clips to secure cables along the underside of the work surface or along panel supports.
For a cleaner look, explore options like cable grommets to pass cables neatly through the work surface. Regularly inspect and adjust cable management to prevent tangling and maintain accessibility. A well-organized cabling system enhances both aesthetics and safety.

Finishing Touches and Adjustments
Personalize your space! Attach accessories, fine-tune panel positions for optimal ergonomics, and conduct a final safety inspection for a fully functional cubicle.
Attaching Desk Accessories
Enhance functionality with carefully selected desk accessories. Begin by installing any provided pencil trays or storage compartments, ensuring they securely fasten to the work surface using the appropriate screws – typically found within the hardware kit. Consider adding monitor arms for ergonomic positioning and maximizing desk space.
Cable management trays are crucial for a tidy workspace; attach these under the work surface, routing cables neatly to prevent tangling. If your cubicle includes a keyboard tray, follow the specific instructions for its installation, paying attention to height adjustments for comfortable typing.
Don’t forget personal touches like desk lamps or organizers. Ensure all accessories are stable and do not interfere with the cubicle’s structural integrity. Regularly check the tightness of screws to maintain stability and safety.
Adjusting Panel Height and Position
Personalize your workspace for optimal comfort and privacy. Steelcase cubicle panels often feature adjustable height settings; locate the release mechanisms – typically levers or buttons – and carefully raise or lower the panels to your desired level. Ensure all panels are securely locked into position after adjustment.
Repositioning panels allows for customized workflow and collaboration. Most panels can be swiveled or rotated within a defined range. Check for locking features to maintain the chosen configuration. Consider sightlines and traffic flow when adjusting panel positions.
Prioritize ergonomic principles; adjust panel height to minimize strain and maximize visibility. Regularly reassess panel positions to accommodate changing needs and preferences. A well-adjusted cubicle promotes productivity and well-being.
Final Inspection and Safety Check
Ensure a secure and functional workspace before full operation. Thoroughly inspect all connections – panels, work surfaces, and support beams – verifying tightness and proper alignment. Confirm that all hardware (screws, bolts, clips) is securely fastened; retighten if necessary.
Check for any sharp edges or protruding components that could pose a safety hazard. Inspect electrical and data connections, ensuring cables are neatly managed and not creating trip hazards. Verify the stability of the entire cubicle structure; gently test for wobble or instability.
Review all assembly instructions one last time to confirm no steps were missed. A final safety check protects against potential injuries and ensures long-term cubicle integrity. Prioritize a safe and productive work environment.

Troubleshooting Common Assembly Issues
Resolve frustrating setbacks quickly! Address misaligned panels, missing hardware, or electrical connection difficulties with focused solutions for a smooth setup.
Misaligned Panels
Addressing Panel Alignment Issues: Misaligned panels are a common frustration during Steelcase cubicle assembly. First, do not force the connection; this can damage components. Carefully re-examine the connecting hardware – ensure all bolts are loosely fitted before final tightening.
Check the floor’s levelness; an uneven surface significantly impacts alignment. Utilize shims under the base of the panels to compensate for discrepancies. If panels still resist alignment, slightly loosen the bolts on adjacent panels to allow for adjustment.
Gently apply pressure to realign, then retighten all bolts in a crisscross pattern to distribute tension evenly. For persistent issues, consult the detailed assembly video resources available online, specifically referencing the Steelcase Series 2 chair assembly as a guide for precision fitting techniques. Remember, patience and methodical checking are key!
Missing Hardware
Dealing with Missing Components: Discovering missing hardware mid-assembly is disruptive, but resolvable. Immediately halt assembly and thoroughly re-check all packaging materials – often, smaller items are concealed within protective layers.
Document the missing parts precisely (size, type, quantity) and contact Steelcase customer support or the vendor from whom you purchased the cubicle. Providing the cubicle’s model number and batch code will expedite the process.
As a temporary measure, do not substitute hardware with non-Steelcase components, as this could void warranties or compromise structural integrity. While awaiting replacements, continue with assembly steps that don’t require the missing parts. Referencing resources like the Steelcase Series 2 chair assembly instructions can highlight the importance of correct hardware for a secure build. Patience is crucial!
Difficulty Connecting Electrical Components
Troubleshooting Electrical Connections: Encountering issues with power and data ports is common. First, ensure the cubicle frame is properly grounded – a crucial safety measure. Double-check all wiring connections, verifying polarity and secure seating of connectors.
If ports aren’t functioning, inspect for damaged cables or loose connections within the cubicle’s internal wiring harness. Refer to the Steelcase wiring diagrams (usually included in the documentation) for correct configurations.
Never attempt electrical work if you are uncomfortable or unqualified. Consider consulting a certified electrician. Remember, similar attention to detail is vital when assembling components like the Steelcase Series 2 chair, where proper actuator rod guide alignment is key. Prioritize safety and consult professional help when needed.

Steelcase Series 2 Chair Assembly (Related)
Chair assembly parallels cubicle precision! Mastering the pinch spring and actuator rod guide ensures smooth operation, mirroring the careful connections needed for cubicle components.
Pinch Spring and Actuator Rod Guide
Precision is paramount when handling the pinch spring and actuator rod. Begin by carefully compressing the spring, ensuring it’s aligned to slide over the actuator rod guide. A pencil mark on the guide assists with correct positioning – the spring’s center should align above this mark during adjustment.
Crucially, maintain parallel alignment of the lock tab to the pedestal’s side while making these adjustments. This ensures a secure and functional connection. This meticulous process, though seemingly small, directly impacts the chair’s overall performance and comfort.
Similar attention to detail is vital during cubicle assembly, particularly when connecting support beams and securing panels. Proper alignment and secure fastening are key to a stable and ergonomic workspace. Remember, a solid foundation, whether in a chair or a cubicle, is essential for long-term usability.
Lock Tab Alignment
Maintaining proper lock tab alignment is critical for a fully functional Steelcase Series 2 chair – and echoes the importance of precise connections in cubicle assembly. While adjusting the pinch spring and actuator rod, consistently verify the lock tab remains parallel to the pedestal’s side. This seemingly minor detail prevents premature disengagement and ensures the chair’s mechanisms operate smoothly.
This principle extends to cubicle construction; ensuring panels and work surfaces lock securely into place is vital for stability. Misalignment can lead to wobbling or, worse, structural failure.
Think of the lock tab as a miniature representation of the larger connection points within a cubicle system. Consistent checks during each stage of assembly – from frame construction to panel installation – guarantee a robust and safe workspace. Prioritize alignment for lasting performance.
Struggling with Steelcase cubicle setup? Find clear, step-by-step **Steelcase cubicle assembly instructions** at ManualCenterPDF.com. Get back to work faster!