kirkland cheese pizza cooking instructions

Kirkland Cheese Pizza Cooking Instructions: A Comprehensive Guide
This guide provides detailed instructions for perfectly baking your Kirkland cheese pizza. Reddit users confirm instructions are conveniently printed on the pizza’s wrapper, eliminating freezer door searches.
Understanding Your Kirkland Cheese Pizza
The Kirkland Signature Cheese Pizza is a popular choice for its convenience and value, frequently discussed on platforms like Reddit’s r/Costco. It’s crucial to recognize that variations exist within the Kirkland pizza line; while many adore the thin crust version, the cheese with breadcrumb crust offers a different experience, often serving as a fantastic base for customized toppings – think sausage, onions, and green peppers.
Understanding these differences is key to adjusting expectations and potentially baking times. The instructions themselves are thoughtfully placed directly on the pizza’s plastic wrapper, a feature praised by consumers for its practicality, saving them from repeatedly opening the freezer during the preheating process. This accessibility ensures you have the necessary guidance readily available. Knowing your specific pizza type – thin crust versus breadcrumb – is the first step towards achieving optimal baking results.
Furthermore, Kirkland’s commitment to quality and affordability makes this pizza a staple for many households, but it’s the user-friendly packaging and clear instructions that truly enhance the overall experience.
Locating the Cooking Instructions
Finding the cooking instructions for your Kirkland Signature Cheese Pizza is remarkably straightforward, a detail consistently highlighted by satisfied customers on online forums like Reddit’s r/Costco. Unlike some frozen pizzas requiring a separate instruction booklet or a deep dive into the freezer, Kirkland has conveniently printed the baking guidelines directly onto the plastic wrapper encasing the pizza itself.
This thoughtful design eliminates the frustrating need to interrupt the preheating process to search for instructions. Simply locate the printed text on the wrapper – it’s typically a clearly defined section with step-by-step directions. This accessibility is a significant advantage, especially when you’re eager to enjoy a quick and easy meal.
Before discarding the wrapper, take a moment to carefully review the instructions. Pay attention to recommended oven temperatures and baking times, as these can vary slightly depending on your oven type. Having this information readily available ensures a perfectly baked pizza every time, minimizing guesswork and maximizing enjoyment.
Initial Preparation: Oven Temperature
The cornerstone of a perfectly baked Kirkland cheese pizza lies in achieving the correct oven temperature. The instructions, conveniently located on the pizza’s wrapper, will specify the ideal heat for optimal results. Generally, a temperature range of 400°F to 450°F (204°C to 232°C) is recommended, though always defer to the specific guidance printed on your pizza’s packaging.
Prior to preheating, ensure your oven rack is positioned in the center. This promotes even heat distribution, crucial for consistent cooking. Selecting the correct temperature is vital; too low, and the crust may become soggy, while too high risks burning the cheese before the base is fully cooked.
Understanding your oven’s quirks is also beneficial. Gas ovens may require slight adjustments compared to electric models. Allow ample time for the oven to reach the designated temperature before placing the pizza inside – a fully preheated oven is essential for achieving that desirable crispy crust and melted cheese.
Preheating the Oven
Proper preheating is arguably the most critical step in preparing to bake your Kirkland cheese pizza. Resist the temptation to rush this process; a fully preheated oven ensures even cooking and a delightfully crispy crust. Allow at least 20-25 minutes for your oven to reach the target temperature, typically between 400°F and 450°F (204°C to 232°C), as indicated on the pizza’s wrapper.
During preheating, avoid repeatedly opening the oven door, as this releases heat and prolongs the process. Utilize your oven’s light to monitor the temperature gauge. A reliable oven thermometer can further confirm accuracy. Remember, variations in oven performance are common, so verifying the temperature is a prudent step.
A well-preheated oven creates a thermal environment that quickly cooks the pizza base, preventing sogginess. This initial burst of heat also helps to melt the cheese evenly and achieve that golden-brown, bubbly finish everyone desires. Patience during preheating translates directly to a superior pizza experience.
Pizza Placement in the Oven
Once the oven is thoroughly preheated, careful pizza placement is essential for optimal results; Position the Kirkland cheese pizza directly on the center oven rack. This ensures even heat distribution from all directions, promoting consistent cooking of both the crust and toppings. Avoid placing the pizza too close to the heating element, as this could lead to burning.
If you’re utilizing a pizza stone (discussed later), slide the pizza onto the preheated stone with a pizza peel. Otherwise, a standard oven rack works perfectly well. Ensure there’s adequate space around the pizza for air circulation; overcrowding the oven can hinder proper baking.
Consider the oven’s heating characteristics. Some ovens have hot spots, so rotating the pizza halfway through baking (covered in a later section) can mitigate uneven cooking. Proper placement, combined with accurate temperature and timing, is key to achieving a perfectly baked Kirkland pizza.
Baking Time for Optimal Results
Achieving the perfect bake with your Kirkland cheese pizza hinges on precise timing. Generally, a baking time of 18-22 minutes at 400°F (204°C) yields excellent results. However, this is a guideline, and variations may be necessary based on your specific oven. Initial checks should begin around the 18-minute mark.
Reddit discussions highlight that consistent monitoring is crucial. Don’t solely rely on the timer; visual cues (detailed in subsequent sections) are paramount. Factors like oven type (gas versus electric) and the use of a pizza stone will influence the required baking duration.
For a crispier crust, consider extending the baking time slightly, but be vigilant to prevent burning. Conversely, if the cheese is browning too quickly, reduce the temperature or shorten the baking time. Experimentation, coupled with careful observation, will help you determine the ideal baking time for your oven and preferences.
Checking for Doneness: Visual Cues
Determining when your Kirkland cheese pizza is perfectly baked relies heavily on observing key visual indicators. Begin by assessing the cheese – it should be fully melted, with a light golden-brown color and bubbling throughout. The bubbles are a strong sign of internal heat and proper cooking.
Next, examine the crust. It should transition from pale dough to a golden-brown hue, exhibiting a slight lift and firmness. Avoid relying solely on color; gently press the crust to test for a satisfying crispness. A soggy or pale crust indicates the need for additional baking time.
Pay attention to the overall appearance. The pizza should look evenly cooked, without any areas of uncooked dough or excessively browned cheese. These visual cues, combined with a crust crispness assessment, will ensure a delicious and satisfying pizza experience. Remember, baking times are guidelines; visual confirmation is key!
Crust Crispness Assessment
Achieving the ideal crust crispness is paramount for a satisfying Kirkland cheese pizza experience. Don’t solely rely on visual cues; a tactile assessment is crucial. Gently lift a corner of the pizza with a spatula. A properly baked crust will offer resistance and a noticeable firmness, indicating structural integrity.
If the crust feels soft or pliable, it requires additional baking time. Continue baking in short increments – two to three minutes – and re-assess after each interval. Be cautious not to overbake, as this can lead to a brittle or burnt crust.
For those utilizing a pizza stone, the crust will generally crisp up more effectively due to direct heat transfer. However, even with a stone, a physical check is still recommended. The goal is a golden-brown crust that provides a delightful crunch with each bite, complementing the melted cheese and flavorful sauce.
Cheese Melt and Bubble Observation
Evaluating the cheese’s melt and bubble formation is a key indicator of your Kirkland pizza’s readiness. The cheese should transition from a matte, opaque white to a glistening, slightly golden hue. Look closely for bubbling – small blisters forming on the cheese’s surface – this signifies the cheese is fully melted and beginning to brown.
Avoid aiming for excessive browning, as this can result in a greasy or overly-hard cheese texture. A gentle golden color with consistent bubbling is the sweet spot. If the cheese appears unmelted or only partially melted, extend the baking time by a minute or two, closely monitoring its progress.
Remember that oven variations can impact melting speed. Consistent observation is vital. A beautifully melted and bubbly cheese layer is a hallmark of a perfectly cooked Kirkland cheese pizza, promising a delicious and satisfying experience.
Using a Pizza Stone (Optional)
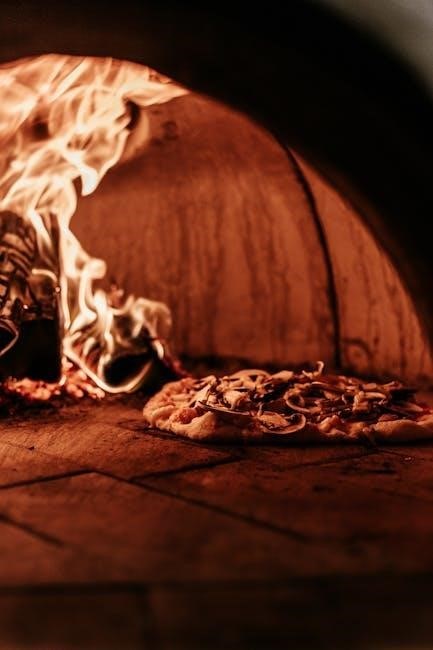
For pizza enthusiasts seeking an elevated crust experience, a pizza stone is a fantastic addition to the Kirkland cheese pizza baking process. A pizza stone, typically made of ceramic or cordierite, retains and distributes heat exceptionally well, mimicking the effect of a professional pizza oven.
Preheating the stone along with the oven is crucial – allow at least 30-60 minutes for it to reach optimal temperature. Carefully transfer the frozen Kirkland pizza directly onto the hot stone. This creates a crisper, more evenly cooked crust compared to baking directly on an oven rack.
Using a pizza peel dusted with cornmeal or flour simplifies the transfer process. Remember to exercise caution when handling the hot stone and pizza. While optional, a pizza stone significantly enhances the texture and overall quality of your Kirkland pizza, delivering a restaurant-style result at home.
Benefits of a Pizza Stone
Employing a pizza stone when baking your Kirkland cheese pizza unlocks a multitude of benefits, primarily centered around superior heat distribution and absorption. Unlike metal baking sheets, a stone heats evenly and retains that heat, creating a consistently hot surface for the pizza to cook upon.
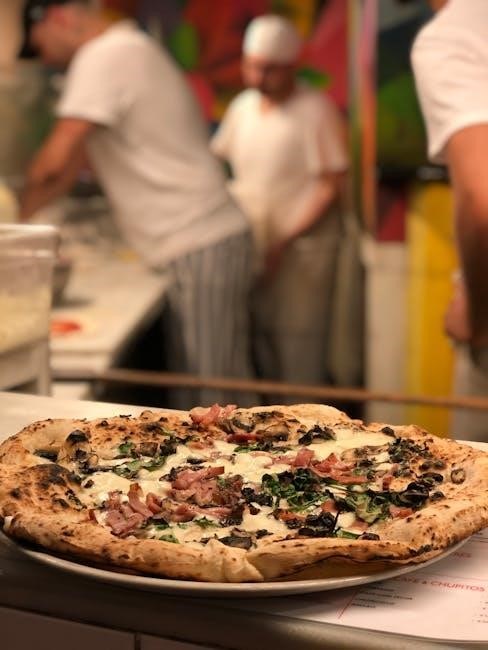
This consistent heat leads to a remarkably crispier crust, as the stone draws moisture away from the dough during baking. The result is a texture that closely resembles wood-fired pizza, far exceeding what’s achievable with conventional methods. Furthermore, a pizza stone minimizes soggy bottoms, a common issue with frozen pizzas;
Beyond texture, a stone can subtly enhance flavor, imparting a slightly earthy nuance to the crust. It’s a relatively inexpensive investment that dramatically improves the overall Kirkland pizza experience, transforming a convenient meal into a genuinely enjoyable culinary treat.
Adjusting Baking Time with a Pizza Stone
When utilizing a pizza stone with your Kirkland cheese pizza, a slight adjustment to the standard baking time is generally required. Because the stone retains and transfers heat so efficiently, the pizza will cook faster than on a conventional baking sheet.
Begin by reducing the recommended baking time by approximately 2-3 minutes. Closely monitor the pizza after the initial reduction, checking for visual cues of doneness – a golden-brown crust and bubbling, melted cheese. It’s crucial to avoid overbaking, which can result in a burnt crust.
Experimentation is key to finding the optimal baking time for your specific oven and stone. Start with a conservative reduction and incrementally increase the time if needed. Remember that preheating the stone thoroughly is paramount for achieving the best results; allow at least 30-45 minutes for complete heat saturation.
Variations in Oven Performance
Oven performance can significantly impact the baking time and overall quality of your Kirkland cheese pizza. Differences between gas and electric ovens, as well as variations within each type, necessitate potential adjustments to the standard cooking instructions. Gas ovens often exhibit temperature fluctuations, while electric ovens tend to maintain a more consistent heat.
If you’re using a gas oven, you might find that the pizza requires a slightly longer baking time to achieve optimal doneness. Conversely, electric ovens may cook the pizza more quickly. It’s essential to observe the pizza closely during baking, paying attention to the crust color and cheese melt.
Older ovens, or those with inaccurate thermostats, may also require adjustments. Consider using an oven thermometer to verify the actual temperature and adjust accordingly. Consistent monitoring and minor adjustments will ensure a perfectly baked Kirkland pizza every time.
Adjusting for Different Oven Types (Gas vs. Electric)
When baking your Kirkland cheese pizza, understanding your oven type – gas or electric – is crucial for achieving optimal results. Gas ovens generally require a slight adjustment due to potential temperature inconsistencies. Begin with the recommended baking time, but be prepared to add 2-3 minutes if the pizza isn’t browning sufficiently.
Electric ovens, known for their consistent heat, often require less adjustment. However, it’s still wise to monitor the pizza closely. If the crust begins to brown too quickly, reduce the baking time by a minute or two. Always prioritize visual cues – a golden-brown crust and bubbly, melted cheese – over strict adherence to the timer.
Remember that oven calibration varies. Using an oven thermometer can confirm your oven’s accuracy, allowing for precise adjustments. Experimenting with small time increments will help you determine the ideal baking time for your specific oven, ensuring a perfectly cooked Kirkland pizza.
Troubleshooting: Pizza Not Cooking Evenly
Uneven cooking is a common issue when baking Kirkland cheese pizza, often stemming from inconsistent oven heat distribution. If one side appears cooked while the other remains pale, rotating the pizza halfway through the baking time is the first and most effective solution. This ensures all areas receive equal exposure to the oven’s heat.
Another potential cause is improper rack placement. Ensure the pizza is positioned on the center rack for balanced heat circulation. Avoid placing it too close to the heating element, which can lead to burning. If your oven has hot spots, identified through previous baking experiences, position the pizza accordingly.
A soggy crust can also contribute to uneven cooking. Preheating the baking sheet or utilizing a pizza stone (discussed elsewhere) can mitigate this. Finally, verify your oven’s temperature accuracy with a thermometer; a miscalibrated oven will yield unpredictable results;
Rotating the Pizza During Baking
To achieve a uniformly cooked Kirkland cheese pizza, rotating it midway through the baking process is crucial. Most home ovens don’t distribute heat perfectly evenly, leading to one side cooking faster than the other. A simple 180-degree turn, typically around the halfway point of the recommended baking time, corrects this imbalance.
Carefully open the oven and, using a pizza peel or large spatula, gently rotate the pizza. Avoid abrupt movements to prevent toppings from sliding off. This technique ensures that all sections of the pizza are exposed to the oven’s heat for an equal duration, resulting in consistent browning and melting of the cheese.
Pay attention to the pizza’s appearance before rotating. If one side is significantly darker than the other, rotate it sooner rather than later. Consistent rotation is a key step in troubleshooting uneven cooking and maximizing the overall quality of your Kirkland pizza.
Dealing with a Soggy Crust
A soggy crust can detract from the enjoyment of your Kirkland cheese pizza, but several techniques can help prevent and address this issue. Ensuring the oven is fully preheated is paramount, as a hot oven floor promotes rapid crust cooking. Consider using a pizza stone or baking steel, which retain heat and transfer it directly to the crust, creating a crispier base.
If sogginess persists, try baking the pizza directly on the oven rack for the last few minutes. This allows for maximum air circulation underneath the crust. Avoid overloading the pizza with toppings, as excess moisture from ingredients can contribute to a soggy texture.
For particularly stubborn cases, briefly increasing the oven temperature during the final minutes of baking can help dry out the crust. However, monitor closely to prevent burning. A crispy crust is achievable with attention to detail and these simple adjustments!
Adding Toppings (Before or After Baking?)
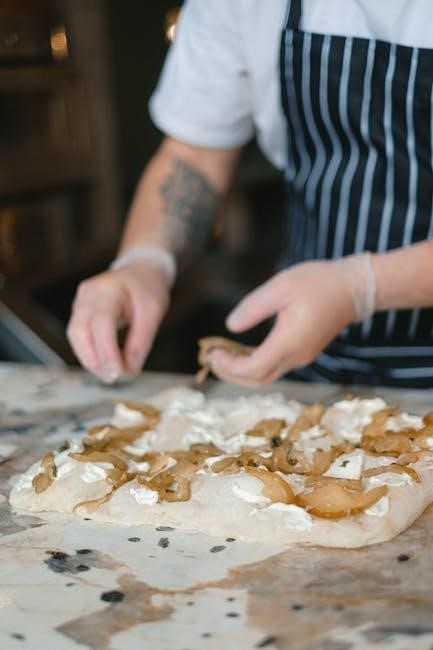
The question of when to add toppings to your Kirkland cheese pizza is a matter of preference, but timing impacts the final result; Adding toppings before baking allows flavors to meld and ingredients to cook alongside the pizza, creating a unified taste experience. However, delicate toppings might burn or become overly crispy.
Reddit discussions suggest the Kirkland cheese pizza, particularly the breadcrumb crust variety, serves as an excellent base for additions. Sausage, onion, and green pepper are popular choices. For toppings best enjoyed fresh, consider adding them after baking. This preserves their texture and vibrant flavors – think fresh basil, pepperoni, or a drizzle of olive oil.
Experiment to find your ideal method! If using pre-cooked toppings, before baking is convenient. For raw vegetables or delicate herbs, a post-bake addition is recommended for optimal quality.
Recommended Topping Combinations
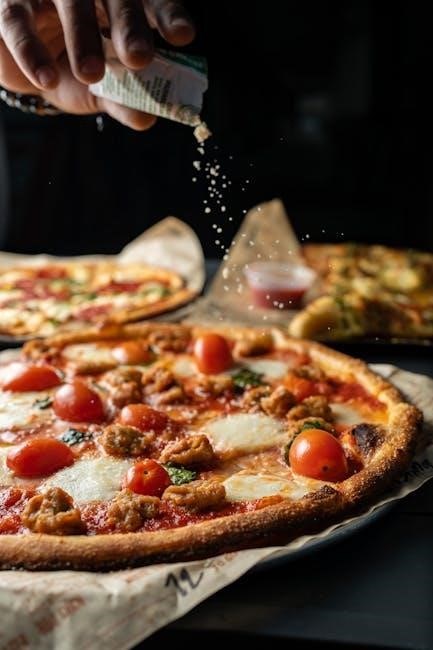
Elevate your Kirkland cheese pizza with inspired topping combinations! Based on popular preferences, a classic Italian pairing of sausage, onion, and green pepper consistently delivers a satisfying flavor profile. For a spicier kick, consider adding pepperoni and jalapeños – a delightful contrast to the creamy cheese.
Those seeking a more gourmet experience might enjoy a combination of mushrooms, roasted red peppers, and caramelized onions. A sprinkle of fresh basil post-bake adds a vibrant, aromatic finish. Another excellent option is a Hawaiian-inspired topping with ham and pineapple, offering a sweet and savory balance.
Don’t be afraid to experiment! Consider a Mediterranean twist with olives, feta cheese, and spinach. Ultimately, the best topping combination is the one that suits your personal taste. The Kirkland pizza’s simple cheese base provides a versatile canvas for culinary creativity.
Post-Baking: Cooling and Slicing
Once your Kirkland cheese pizza emerges from the oven, resist the immediate urge to dive in! Allowing a brief cooling period – approximately 5 to 10 minutes – is crucial for optimal slicing and preventing burnt fingers. This allows the cheese to set slightly, resulting in cleaner cuts and a more enjoyable eating experience.
When slicing, a pizza cutter is highly recommended for its efficiency and precision. Alternatively, a large, sharp knife can be used, employing a gentle rocking motion. Ensure a stable cutting surface to avoid accidents. Prioritize safety when handling the hot pizza; oven mitts or pot holders are essential.
Proper slicing ensures each piece retains its toppings and structural integrity. Consider the size of your slices based on your appetite and the number of people sharing. Enjoy your perfectly baked Kirkland pizza!
Safe Handling of Hot Pizza
Immediately after removing your Kirkland cheese pizza from the oven, remember it’s extremely hot! Prioritize safety to prevent burns. Always use oven mitts or heat-resistant pot holders when handling the pizza, even for a short duration. Avoid using damp cloths, as steam can cause severe burns.
The pizza stone, if used, will retain significant heat – allow it to cool completely before attempting to move it. Exercise caution when transferring the pizza to a cutting board or serving surface. A stable, heat-resistant surface is essential to prevent accidental tipping or spills.
Warn others in the vicinity that the pizza and surrounding cookware are hot. Supervise children closely to ensure they maintain a safe distance. Remember, a moment of carelessness can lead to painful injuries. Enjoy your pizza responsibly and safely!
Storage of Leftover Kirkland Pizza
Properly storing leftover Kirkland cheese pizza is crucial for maintaining its quality and preventing foodborne illness. Allow the pizza to cool completely before storing it – this prevents condensation buildup, which can lead to sogginess. Once cooled, transfer the slices to an airtight container or tightly wrap them in plastic wrap or aluminum foil.
Refrigerate leftover pizza promptly, ideally within two hours of baking. Stored correctly, it will remain safe to eat for three to four days. For longer storage, consider freezing. Wrap individual slices tightly in plastic wrap, then place them in a freezer-safe bag or container.
Frozen pizza can maintain good quality for up to two months; When reheating, consider a quick bake in the oven for optimal crispness, avoiding the microwave which can make the crust soggy. Enjoy your leftovers responsibly!
Craving a perfect Kirkland cheese pizza? We’ve got you covered! Find easy-to-follow cooking instructions for a golden, bubbly, and totally satisfying pizza night. Let’s bake!