canon a1 instruction manual

Canon A1 Instruction Manual: A Comprehensive Guide
This manual provides detailed guidance on the Canon A1’s features, operation, and maintenance. It assists users in safely navigating setup, usage, and care.
Welcome to the world of classic photography with the Canon A1! This fully electronic 35mm SLR, released in 1976, revolutionized camera technology, offering photographers unprecedented control and convenience. This comprehensive guide is designed to unlock the full potential of your Canon A1, whether you’re a seasoned enthusiast or a newcomer to film photography.
The Canon A1 introduced features previously unseen in its price range, including shutter priority auto-exposure, electronic self-timer, and compatibility with a wide range of Canon FD lenses. Understanding its capabilities will allow you to capture stunning images with ease. This manual will walk you through every aspect of the camera, from initial setup to advanced shooting techniques.
Unboxing and Initial Setup
Upon receiving your Canon A1, carefully inspect the box for any signs of damage during shipping. Inside, you should find the camera body, a standard strap, and potentially some original documentation – though often missing with vintage cameras. Before inserting batteries, visually inspect the film chamber and lens mount for dust or debris.
The Canon A1 requires 4x AA batteries for operation. Install them correctly, observing the polarity markings. Once batteries are in place, the camera should power on, displaying information in the viewfinder. Ensure the shutter fires and the light meter responds to varying light conditions. Familiarize yourself with the battery compartment location for easy access.
Understanding the Camera Body
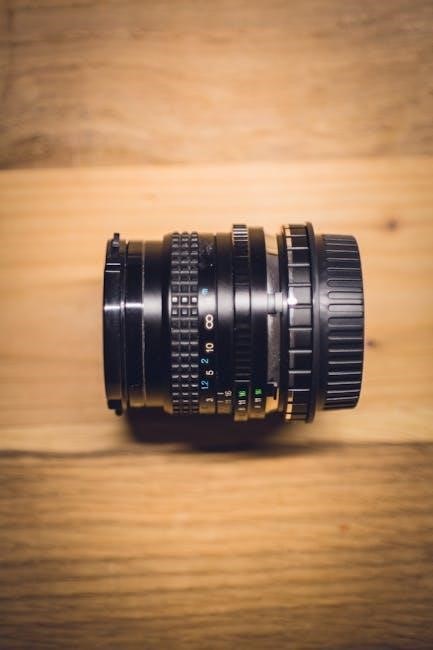
The Canon A1 boasts a robust, yet relatively compact, body constructed primarily of metal. Its design prioritizes accessibility and user control. The top plate houses the main control dials – shutter speed and aperture – alongside the film advance lever and rewind crank. The back of the camera features a large viewfinder and controls for various shooting modes and settings.
Pay attention to the location of the battery compartment, typically on the bottom of the camera. The A1 utilizes a standard Canon FD lens mount, allowing compatibility with a wide range of FD lenses. The body also includes a built-in light meter and flash capabilities, enhancing its versatility for diverse photographic scenarios.
Key Buttons and Dials
The Canon A1’s functionality centers around several key controls. The shutter speed dial, located on the top plate, allows selection from a wide range of speeds, typically from 2 seconds to 1/1000th of a second. Adjacent is the aperture control, directly linked to the lens. The mode dial selects shooting modes like Shutter Priority, Aperture Priority, and Manual.
The film advance lever cocks the shutter and advances the film. The rewind crank retracts the film back into the cassette. A crucial button activates the built-in light meter, while others control flash operation and depth-of-field preview. Familiarizing yourself with these controls is essential for efficient operation.
Viewfinder Information
The Canon A1’s viewfinder provides crucial shooting data. Within the bright, clear view, you’ll find a central spot metering indicator, assisting with accurate exposure. LEDs illuminate to show overexposure, underexposure, or correct exposure based on the camera’s metering. A microprism collar aids in precise manual focusing, becoming clearer as focus is achieved.
Additionally, the viewfinder displays shutter speed, aperture setting (when in Aperture Priority), and a split-image rangefinder for enhanced focusing accuracy. A depth-of-field preview lever allows visualization of the image’s sharpness at the selected aperture. Understanding these indicators is vital for achieving well-exposed, sharply focused photographs.
Loading Film
Loading film into the Canon A1 is a straightforward process. First, open the camera back using the film release lever. Insert the 35mm film cassette into the film chamber, ensuring it seats correctly. Pull the film leader across the camera and attach it to the take-up spool. Advance the film using the film advance lever, checking that the sprocket holes engage properly.
Close the camera back firmly. Continue advancing the film and using the rewind crank to ensure proper tension. The film counter will automatically display the number of exposures taken. Always rewind the film completely before opening the camera back to prevent light leaks and damage to your images.
Shooting Modes
The Canon A1 offers versatile shooting modes for diverse photographic situations. It features Shutter Priority mode, allowing you to select the shutter speed while the camera automatically sets the aperture for correct exposure. Aperture Priority mode lets you control the depth of field by choosing the aperture, with the camera determining the appropriate shutter speed.
Additionally, the A1 provides a fully manual mode for complete creative control over both shutter speed and aperture. Program mode automates both settings for quick and easy shooting. Understanding these modes empowers you to achieve desired effects, from freezing action to creating blurred backgrounds.
Shutter Priority Mode
In Shutter Priority mode, you, the photographer, dictate the shutter speed, controlling how long the camera’s sensor is exposed to light. This is ideal for capturing fast-moving subjects, like sports or wildlife, by using a fast shutter speed to freeze the action. Conversely, a slower shutter speed can create motion blur, conveying a sense of movement or capturing light trails.
The Canon A1 automatically calculates the appropriate aperture setting to achieve proper exposure based on your chosen shutter speed and the existing light conditions. This mode balances creative control with automated assistance, simplifying complex shooting scenarios.
Aperture Priority Mode
Aperture Priority mode empowers you to select the desired aperture (f-stop), directly influencing the depth of field in your photographs. A wider aperture (smaller f-number, like f/2.8) creates a shallow depth of field, isolating your subject with a blurred background – perfect for portraits. Conversely, a narrower aperture (larger f-number, like f/16) yields a greater depth of field, keeping more of the scene in focus, suitable for landscapes.
The Canon A1 then automatically determines the appropriate shutter speed to achieve correct exposure, balancing your aperture choice with the available light. This mode offers creative control over focus while simplifying exposure settings.
Focusing System
The Canon A1 relies on a manual focusing system, demanding precise adjustments via the focusing ring on the lens. This offers complete control over the focal point, crucial for artistic expression and achieving sharp images. Carefully observe the image in the viewfinder, utilizing split-image or microprism collars to confirm accurate focus. These aids become clearer as the subject nears critical focus.
The camera also features a focus lock capability. Once focus is achieved, you can hold it while recomposing the shot, ensuring the intended subject remains sharp. Practice is key to mastering manual focusing and maximizing the A1’s potential.
Manual Focusing
The Canon A1’s manual focusing system requires direct, hands-on control. Rotate the focusing ring on your lens while observing the image within the viewfinder. Pay close attention to the split-image or microprism collars – these become aligned and clear when the subject is in sharp focus. Achieving precise focus takes practice and a keen eye.
Unlike modern autofocus systems, you are entirely responsible for achieving sharpness. Slow, deliberate adjustments are often more effective than rapid turning. Mastering manual focus unlocks creative control and a deeper understanding of photographic principles, allowing for truly intentional image creation.
Focus Lock
The Canon A1 offers a focus lock feature, useful for composing shots where the focal point isn’t the center of the frame. Half-press the shutter button to lock focus on your desired subject. While holding the shutter halfway down, recompose the shot as needed. The focus will remain locked on the initially selected point.
This technique is particularly valuable when using off-center focusing points or when photographing moving subjects. Remember to maintain the half-press throughout recomposition to prevent the focus from shifting. Practice this method to ensure consistently sharp images, even with dynamic compositions.
Exposure Control

The Canon A1 provides photographers with significant control over exposure, offering both automatic and manual modes. Understanding these controls is crucial for achieving properly exposed photographs. The camera utilizes a sophisticated metering system to assess the light in the scene, suggesting appropriate aperture and shutter speed combinations.
However, relying solely on automatic modes isn’t always ideal. The A1 allows for manual override, granting full creative control. Furthermore, exposure compensation features enable fine-tuning of the meter’s readings, ensuring accurate exposure in challenging lighting conditions. Mastering these elements unlocks the camera’s full potential.
Metering Modes

The Canon A1 offers several metering modes to suit diverse shooting scenarios. These modes dictate how the camera evaluates light to determine the correct exposure. Center-weighted average metering prioritizes the center of the frame, ideal for portraits and general photography. Evaluative metering analyzes the entire scene, providing a balanced exposure for complex compositions.

Spot metering focuses on a very small area, useful for challenging lighting or when precise exposure of a specific subject is needed; Selecting the appropriate metering mode is vital for achieving desired results. Experimentation with each mode will help you understand their strengths and weaknesses, enhancing your photographic control.
Exposure Compensation
Exposure compensation allows you to override the camera’s automatic exposure settings. This is crucial when the camera’s meter is fooled by unusually bright or dark scenes. Using the +/- dial, you can instruct the camera to brighten or darken the image. Positive values (+1, +2) increase exposure, making the image brighter, while negative values (-1, -2) decrease exposure, darkening the image.
Understanding when and how to use exposure compensation is key to achieving properly exposed photographs. Snow scenes, for example, often require positive compensation, while dark subjects may need negative compensation. Practice and observation will refine your ability to utilize this powerful tool.
Using the Built-in Light Meter
The Canon A1 features a sophisticated built-in light meter to assist in achieving correct exposure. This meter measures the light reflected from the scene and suggests appropriate aperture and shutter speed combinations. The viewfinder displays a needle indicating whether the scene is underexposed, correctly exposed, or overexposed.

To utilize the meter effectively, set the camera to one of the semi-automatic modes (Shutter Priority or Aperture Priority). The meter continuously adjusts to changing light conditions. Remember to select the appropriate metering mode for the scene to ensure accurate readings and optimal image results.
Flash Photography
The Canon A1 offers versatile flash photography options, including a built-in flash and compatibility with external flash units. The built-in flash is convenient for fill-in light or low-light situations, activated by a release button on the camera body. For more powerful and creative lighting, external flashes can be connected via the hot shoe.
When using flash, consider the distance to the subject and adjust the flash exposure compensation accordingly. The A1 supports TTL (Through-The-Lens) flash metering with compatible external units, automating flash power settings for accurate exposure. Experiment with different flash modes to achieve desired effects.
Built-in Flash Operation
The Canon A1’s built-in flash provides a convenient light source for various shooting scenarios. Activation is simple – press the release button located on the camera’s top panel. The flash automatically calculates exposure based on the selected metering mode. However, manual adjustments are possible using the flash exposure compensation dial.
Be mindful of the flash’s effective range; performance diminishes at longer distances. For close-up subjects, a diffuser can soften the light and reduce harsh shadows. Red-eye reduction is also available, utilizing a pre-flash to constrict pupils. Remember to allow the flash to recycle between shots for optimal performance.
External Flash Compatibility
The Canon A1 offers extensive compatibility with a range of Canon Speedlites and other compatible external flash units. Utilizing an external flash unlocks advanced lighting control and greater power than the built-in unit. Connection is achieved via the hot shoe, providing both electrical and mechanical linkage.
TTL (Through-The-Lens) flash metering is supported with compatible Speedlites, automating exposure settings. Manual flash control is also available, allowing precise adjustment of power output. Dedicated flash units offer features like high-speed sync and wireless operation. Ensure proper synchronization settings are selected for optimal results, avoiding dark bands in images.
Advanced Features
The Canon A1 boasts several advanced features catering to experienced photographers. Depth of field control allows manipulation of focus areas, creating artistic effects and isolating subjects. Multiple exposure functionality enables combining multiple images into a single frame, fostering creative possibilities.
The camera’s sophisticated metering system, coupled with exposure compensation, ensures accurate exposures in challenging lighting conditions. Furthermore, the A1’s robust build quality and reliable mechanics contribute to its longevity. Mastering these features unlocks the full potential of this classic camera, allowing for truly unique and expressive photography.
Depth of Field Control
The Canon A1 offers precise control over depth of field, a crucial element in photographic composition. By adjusting the aperture, photographers can manipulate which parts of the image appear sharp. A wider aperture (smaller f-number) creates a shallow depth of field, ideal for isolating subjects with blurred backgrounds – perfect for portraits.

Conversely, a narrower aperture (larger f-number) increases the depth of field, ensuring greater sharpness throughout the scene, suitable for landscapes. Understanding this relationship allows for creative control, directing the viewer’s eye and enhancing the overall impact of your photographs.
Multiple Exposures
The Canon A1’s multiple exposure capability allows for the creation of surreal and artistic images by combining two or more exposures onto a single frame. This feature opens a world of creative possibilities, letting you layer images, blend textures, and achieve unique effects not possible with single exposures.
To utilize this function, the camera must be set to the multiple exposure mode, and after each exposure, the shutter is released again without advancing the film. Experimentation is key to mastering this technique, allowing for the creation of dreamlike and evocative photographs.
Troubleshooting Common Issues
Encountering problems with your Canon A1 is common, but many are easily resolved. If the film doesn’t advance, check the battery and ensure the film is loaded correctly. Light leaks often indicate a problem with the light seals; consider replacement.
If the shutter doesn’t fire, verify the shutter speed dial isn’t set to ‘B’ and the battery has sufficient charge. A consistently dark image suggests incorrect metering or exposure settings. Regularly inspect the camera for any physical damage or obstructions. Proper maintenance can prevent many issues, ensuring years of reliable use.
Maintenance and Care
Proper maintenance extends the life of your Canon A1. Regularly clean the camera body with a soft, dry cloth to remove dust and fingerprints. Avoid using harsh chemicals or solvents. Inspect the light seals periodically for deterioration, as these can cause light leaks.
Store the camera in a cool, dry place, away from direct sunlight and extreme temperatures. When not in use for extended periods, remove the batteries to prevent corrosion. Gentle handling is crucial; avoid dropping or subjecting the camera to impact. Professional servicing is recommended for complex repairs or cleaning.
Technical Specifications
The Canon A1 is a 35mm SLR camera renowned for its advanced features. It utilizes an electronically controlled shutter, offering speeds from 2 seconds to 1/1000th of a second. The camera accepts Canon FD mount lenses and features a top shutter speed of 1/1000 sec. It incorporates a TTL (Through-The-Lens) metering system for accurate exposure.
Film speed range is from 25 to 3200 ISO. The A1 operates on four LR44 or two SR44 batteries. Dimensions are approximately 136 x 87 x 48 mm, with a weight of around 620g without a lens. Its robust build and electronic capabilities made it a popular choice among photographers.
Resources and Further Learning
For deeper understanding of the Canon A1, explore online resources. Central-manuals.com provides a downloadable operating instruction manual in English, a valuable asset for users. Photography forums, like (Fengniao Photography Forum), offer discussions and user experiences with the camera. Websites dedicated to vintage cameras often feature articles and guides.
Consider searching for Canon A1 tutorials on platforms like YouTube. These visual aids can demonstrate practical techniques. Additionally, exploring photography books focusing on film cameras and the FD lens system will enhance your knowledge. Remember to consult multiple sources for a comprehensive learning experience.
Lost your Canon A1 manual? Find a free, downloadable PDF guide right here! Learn all the features, settings & troubleshooting tips for amazing photos. ✨