singer one sewing machine manual
Singer One Sewing Machine Manual: A Comprehensive Guide
This manual serves as your essential guide to operating and maintaining your Singer One. It details features, safety precautions, and troubleshooting, ensuring successful sewing experiences.
Welcome! The Singer One sewing machine represents a blend of modern convenience and the renowned Singer legacy. This machine is designed for both beginners venturing into the world of sewing and experienced enthusiasts seeking a reliable and versatile tool. It’s built to handle a wide range of projects, from simple garment alterations to more complex creative endeavors.
This introduction will familiarize you with the core capabilities of your Singer One. Understanding its features and potential will empower you to unlock its full creative potential. The machine aims to provide a user-friendly experience, making sewing accessible and enjoyable. Proper use, guided by this manual, will ensure years of dependable service and beautiful results.
Understanding Your Machine’s Components
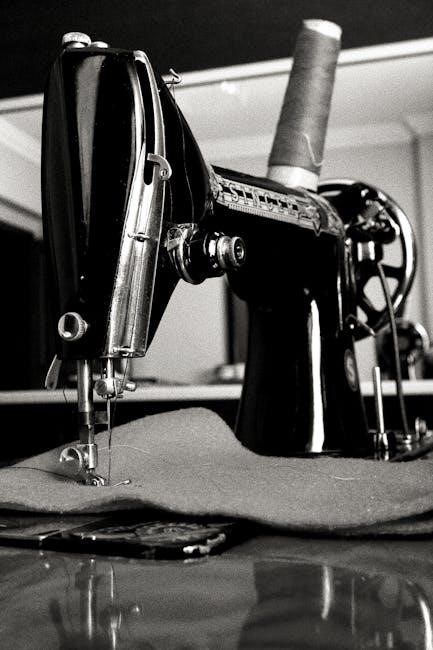
Familiarization is key! Your Singer One comprises several essential components working in harmony. These include the power switch, handwheel for manual control, stitch selection dial, and stitch length/width adjustments. The presser foot, responsible for fabric feeding, is easily interchangeable. The bobbin winder and bobbin case are crucial for thread delivery.

The needle clamp secures the needle, while the thread tension dial controls stitch quality. Don’t overlook the feed dogs, which advance fabric under the needle. Understanding each part’s function – and its location – will streamline your sewing process and facilitate maintenance. Refer to the diagrams within this manual for visual identification of each component.
Setting Up Your Singer One
Preparation is paramount! Begin by placing your Singer One on a stable, level surface. Connect the power cord and ensure the power switch is off. Next, attach the desired presser foot – the standard foot is ideal for initial setup. Insert a new needle, ensuring it’s securely fastened in the clamp.

Now, prepare the bobbin by winding it with thread (detailed in a later section). Insert the bobbin into the bobbin case, following the threading path illustrated in the manual. Finally, thread the upper thread, again meticulously following the diagram. Proper setup guarantees smooth operation and prevents common sewing issues.
Threading the Machine
Accurate threading is crucial for optimal stitch formation. Begin by raising the presser foot; this opens the tension discs. Guide the thread from the spool pin, through the first thread guide, and then down and around the tension disc. Continue following the numbered threading path illustrated in your manual – it’s vital to adhere to this sequence.
Next, thread the take-up lever and guide the thread through the upper thread guide. Finally, thread the needle from front to back. Ensure the thread is fully inserted into the needle eye. A correctly threaded machine minimizes tension problems and ensures consistent, beautiful stitches. Double-check each step!
Winding the Bobbin

Properly wound bobbins are essential for smooth sewing. Place the spool of thread on the spool pin and guide the thread to the bobbin winder tension disc. Then, thread the end of the thread through the bobbin, ensuring it’s securely attached. Position the bobbin onto the bobbin winder spindle.
Engage the bobbin winder by pushing it to the right. Press the foot pedal gently to start winding. Allow the bobbin to fill evenly, stopping when nearly full to prevent overflow. Disengage the bobbin winder and trim the thread. A consistently wound bobbin ensures even tension during sewing.
Basic Sewing Techniques
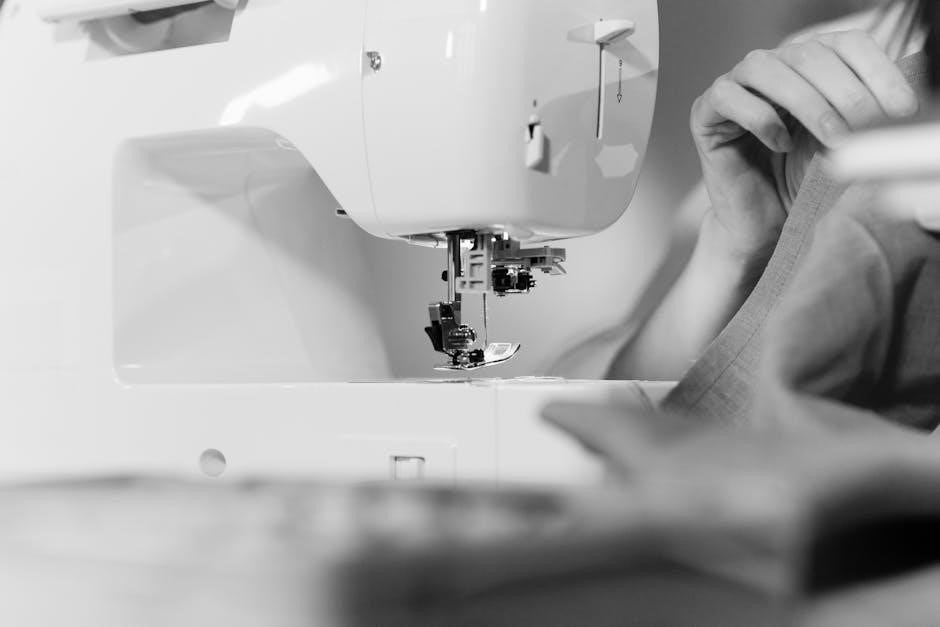
Mastering fundamental techniques unlocks your Singer One’s potential. Begin with practice fabric to familiarize yourself with the machine’s operation. Ensure correct threading and bobbin insertion before starting. Select your desired stitch – straight or zigzag – using the stitch selector dial. Adjust stitch length and width according to your project needs.
Hold the fabric gently, guiding it smoothly under the presser foot. Maintain a consistent sewing speed for even stitches. Backstitch at the beginning and end of each seam to secure the threads. Practice turning corners and sewing curves for greater control. These basics form the foundation for all sewing projects.
Straight Stitching
The cornerstone of sewing, straight stitching creates durable seams. Select the straight stitch option on your Singer One, typically indicated by a straight line symbol. Adjust the stitch length; shorter stitches are ideal for delicate fabrics, while longer stitches suit heavier materials. A standard length of 2.5mm is a good starting point.
Place your fabric under the presser foot, aligning the edge with the desired seam allowance guide. Gently guide the fabric, avoiding pulling or pushing. Maintain a consistent speed for uniform stitches. Practice sewing straight lines on scrap fabric before tackling your project. Backstitch at both ends to secure the seam, preventing unraveling.
Zigzag Stitching
Zigzag stitching offers versatility beyond basic seams. Select the zigzag stitch on your Singer One, identified by the zigzag symbol. Adjust both stitch length and width; wider stitches create more flexible seams, ideal for stretch fabrics, while narrower stitches are suitable for finishing raw edges. Experiment with different settings on scrap fabric.
Zigzag stitches prevent fabric fraying and add decorative elements. Use it to overcast edges, apply appliques, or create elastic casings. Guide the fabric smoothly, maintaining a consistent speed. A medium stitch length and width (e.g., 2.5mm length, 2.0mm width) is a good starting point for general use. Practice to master control and achieve desired results.
Advanced Stitching Options
Your Singer One expands beyond basic stitches with advanced options for creative projects. Explore buttonhole stitching, allowing you to create professional-looking buttonholes directly on your fabric. Refer to the dedicated buttonhole foot and stitch settings in this manual for optimal results. Decorative stitching unlocks a world of embellishment, adding unique designs to garments and home décor.
Experiment with various decorative stitch patterns, adjusting length and width to achieve desired effects. Utilize different threads and fabric combinations to enhance visual appeal. Remember to test stitches on scrap fabric before applying them to your final project. Mastering these advanced features elevates your sewing skills and opens doors to limitless creativity.
Buttonhole Stitching
The Singer One simplifies buttonhole creation with its dedicated buttonhole stitch function. Begin by attaching the buttonhole foot, ensuring it clicks securely into place. Select the appropriate buttonhole stitch setting on your machine, referencing the manual for guidance based on button size. Position your fabric and carefully lower the presser foot.
The machine will automatically stitch around the buttonhole outline. Follow the markings on the machine or the buttonhole foot for accurate placement. After completing the stitch, carefully cut open the buttonhole fabric, avoiding any loose threads. Practice on scrap fabric to perfect your technique before working on your final garment.
Decorative Stitching

Unleash your creativity with the Singer One’s diverse range of decorative stitches! Access these stitches via the stitch selection dial, consulting your manual for a complete pattern guide. Attach the appropriate decorative foot for optimal results – a clear or open-toe foot is often recommended. Adjust stitch width and length to customize the design to your preference.
Test stitch on scrap fabric before applying to your project. Decorative stitches are ideal for embellishing garments, creating unique borders, or adding personalized touches to home décor. Experiment with different thread colors and fabric types to achieve stunning effects. Remember to balance stitch density with fabric weight for best outcomes.
Troubleshooting Common Issues
Encountering problems? This section addresses frequent Singer One issues. For needle breakage, ensure the correct needle type is installed for your fabric and that it’s properly inserted. Thread bunching often indicates incorrect threading, improper tension, or a poorly wound bobbin. Always re-thread the machine following the manual’s diagrams.
If fabric puckers, adjust the presser foot pressure or try a walking foot. Skipped stitches can stem from a dull needle, incorrect needle size, or thread incompatibility. Consult the manual’s troubleshooting chart for specific error codes or symptoms. Remember to unplug the machine before attempting any internal adjustments or repairs.
Needle Breakage
Frequent needle breakage is a common concern. First, verify you’re using the correct needle type and size for your fabric weight – a fine needle for delicate fabrics, a heavier one for denim. Ensure the needle is fully and correctly inserted into the needle clamp; a loose needle is prone to breaking.
Incorrect threading can also cause breakage. Re-thread the machine carefully, following the manual’s diagram. Avoid pulling or forcing the fabric while sewing, as this puts excessive strain on the needle. A bent or damaged needle should always be replaced immediately. Finally, check for obstructions within the needle plate area.
Thread Bunching
Thread bunching usually indicates a tension issue. Begin by re-threading both the upper thread and the bobbin, ensuring proper routing through all tension discs. Incorrect tension is the most frequent cause; experiment with slightly adjusting the upper tension dial. A poorly wound bobbin can also contribute – rewind it evenly and firmly.
Verify the needle is correctly inserted and isn’t bent or damaged. Clean the bobbin case thoroughly, removing any lint or debris. Using the wrong type of thread or fabric can exacerbate the problem. Finally, ensure the presser foot is down while sewing, as this engages the tension mechanism.
Maintenance and Care
Regular maintenance extends the life of your Singer One and ensures optimal performance. Frequent cleaning is crucial; remove lint and dust from the bobbin area, feed dogs, and around the needle plate after each use. A small brush is ideal for this task. Avoid using compressed air, as it can push debris further inside.
Periodically, a more thorough cleaning is needed. Consult your manual for specific instructions on accessing internal components. Lubrication is also vital, but only use sewing machine oil in designated areas – over-oiling can attract dust. Store your machine covered to protect it from dust and damage.
Cleaning Your Singer One
Consistent cleaning is paramount for a smoothly functioning Singer One. Begin by disconnecting the power supply. Use a soft brush – often included with your machine – to remove lint and thread debris from the bobbin case, feed dogs, and needle plate after each sewing session. Pay close attention to areas where thread accumulates.
For deeper cleaning, a lint brush or vacuum cleaner with a brush attachment can be used cautiously. Never use compressed air, as it can force dust into sensitive mechanisms. Wipe down the exterior with a damp cloth. Avoid harsh chemicals or abrasive cleaners, which could damage the finish. Regular cleaning prevents jams and ensures accurate stitching.
Lubrication Guide
Proper lubrication maintains the Singer One’s internal mechanisms, ensuring smooth operation and longevity. However, modern Singer One machines generally require minimal oiling – excessive oil attracts dust and can cause issues. Consult your specific model’s manual for precise lubrication points.
Typically, a drop of sewing machine oil applied to the bobbin race and the motor shaft (if accessible) is sufficient. Use only sewing machine oil; other oils can gum up the works. Apply sparingly with an oiler or a small brush. After oiling, run the machine briefly to distribute the oil. Avoid oiling the feed dogs or tension discs. Regular cleaning often reduces the need for frequent lubrication.
Understanding Stitch Length and Width
Stitch length determines the distance between each stitch, impacting fabric strength and appearance. Shorter stitches are ideal for delicate fabrics and curves, while longer stitches suit heavier materials and quicker sewing. The Singer One allows adjustable stitch length via a dial or electronic controls.

Stitch width controls the zigzag stitch’s breadth, influencing seam finishing and decorative effects. A narrower width creates a straight stitch, while wider settings produce broader zigzag patterns. Experiment with different width settings to achieve desired results. Understanding these adjustments unlocks creative potential and ensures optimal sewing for various projects and fabric types.
Presser Feet Guide
The standard presser foot is your all-purpose tool, perfect for straight and zigzag stitching on most fabrics. Ensure it’s securely attached before beginning any project. The zipper presser foot facilitates smooth zipper insertion, gliding along the teeth without obstruction. It’s narrower design allows close stitching along the zipper tape.
Your Singer One may include additional feet like a buttonhole foot, blind hem foot, or satin stitch foot, each designed for specific tasks. Refer to your machine’s accessory guide for detailed instructions on utilizing each foot. Correct presser foot selection dramatically improves stitch quality and sewing efficiency.
Standard Presser Foot
The standard presser foot, often included with your Singer One, is the most versatile foot for everyday sewing. It’s ideal for straight stitching, zigzag stitching, and general fabric manipulation. Ensure the foot is correctly aligned and securely snapped into place before starting to sew; improper attachment can cause skipped stitches or fabric feed issues.
This foot works well with a wide range of fabrics, from lightweight cottons to medium-weight denims. For thicker materials, consider increasing the presser foot pressure if your machine has that adjustment. Regularly inspect the foot for damage or buildup of lint, as this can affect its performance. Proper maintenance ensures consistent stitch quality.

Zipper Presser Foot
The zipper presser foot is specifically designed for installing zippers smoothly and accurately. It features a groove that guides the zipper teeth, keeping them aligned during stitching. This foot comes in two main types: left-zip and right-zip, depending on the zipper’s position. Ensure you’re using the correct foot for your zipper orientation.
To use, position the zipper face down, and gently guide it through the groove of the foot. Sew slowly and steadily, keeping the zipper teeth aligned. This foot minimizes the risk of broken needles or damaged zipper teeth. Regularly check the groove for lint or debris, as buildup can hinder smooth zipper installation.
Needle Selection Guide
Choosing the right needle is crucial for optimal sewing performance and fabric protection. Singer One machines require system 130/705H needles. Universal needles (size 80/12, 90/14) work well for woven fabrics. Ballpoint needles (size 75/11, 90/14) are ideal for knits, preventing skipped stitches and fabric runs.
Denim/Jeans needles (size 90/14, 100/16) penetrate heavy fabrics effectively. Leather needles have a wedge-shaped point for leather and suede. Always match the needle size to the fabric weight; finer fabrics need smaller needles, while heavier fabrics require larger ones. Replace needles frequently – after 8 hours of use or if bent/damaged.
Tension Adjustment
Proper tension is vital for balanced stitches. Incorrect tension results in looping or puckering; Begin with the tension dial set to the default ‘4’. Test sew on a scrap of your fabric. If the top thread loops on the underside, increase the top tension (higher number). If the bobbin thread pulls to the top, decrease the top tension (lower number).
Small adjustments are key – a half-point increment at a time. Re-test after each adjustment. Consistent tension ensures neat, professional-looking seams. Remember to re-thread both the top and bobbin if you’ve made significant changes, as thread path issues can mimic tension problems.
Using Different Types of Thread
The Singer One accommodates various thread types, but selection impacts stitch quality. All-purpose polyester thread is ideal for most fabrics. Cotton thread suits natural fibers like cotton and linen, offering a softer finish. Heavy-duty nylon thread excels with thicker materials like denim or upholstery fabrics.

Always match thread weight to fabric weight. Finer fabrics require finer thread. Test new thread combinations on scrap fabric before starting your project. Ensure the bobbin is wound with matching thread. Different threads have varying elasticity; adjust tension accordingly for optimal results and avoid puckering or breakage.
Singer One Accessories
Your Singer One benefits from a range of accessories enhancing its versatility. Standard accessories include assorted presser feet – a zipper foot, buttonhole foot, and general-purpose foot – enabling diverse sewing tasks. Additional bobbins are crucial for uninterrupted projects, while a seam ripper aids in correcting mistakes efficiently.
Needles in various sizes are essential for different fabric weights. A lint brush keeps the machine clean, and a screwdriver facilitates maintenance. Consider purchasing a quilting guide for precise stitching and edge stitching foot for professional finishes. Explore Singer’s official website for compatible accessories designed specifically for the Singer One model.
Safety Precautions
Always disconnect the power supply before threading, changing the needle, or performing any maintenance on your Singer One. Keep fingers away from moving parts, especially the needle and presser foot, during operation to prevent injuries. Never sew over pins or thick fabric layers, as this can damage the needle and machine.
Ensure the machine is placed on a stable, level surface during use. Supervise children when the machine is in operation, and store it in a safe, dry location when not in use. Do not attempt to repair the machine yourself; contact a qualified technician for assistance. Always use the correct voltage and follow electrical safety guidelines.
Finding Additional Resources
For comprehensive support, explore online manuals and resources dedicated to the Singer One sewing machine. Numerous websites offer downloadable manuals, troubleshooting guides, and instructional videos to enhance your sewing experience. Frequently Asked Questions (FAQ) sections address common user queries, providing quick solutions to everyday issues.
Singer’s official website is a valuable source of information, including updated software, accessory details, and contact information for customer support. Online sewing communities and forums provide a platform to connect with fellow enthusiasts, share tips, and seek advice. Utilize these resources to maximize your Singer One’s potential.
Online Manuals and Support
Accessing digital resources streamlines your Singer One experience. Numerous websites host downloadable PDF versions of the user manual, offering convenient offline access. Singer’s official support page provides a searchable database of FAQs, troubleshooting guides, and how-to videos addressing common issues. These resources are invaluable for quick problem-solving and understanding machine functions.
Furthermore, explore online sewing forums and communities where experienced users share tips, tricks, and solutions. These platforms offer a collaborative environment for learning and support. Direct contact with Singer’s customer service is also available through their website, providing personalized assistance when needed.
Frequently Asked Questions (FAQ)
Q: My machine is skipping stitches – what should I do? A: Ensure the needle is correctly inserted, the thread is properly loaded, and the tension is appropriately adjusted. Check for a bent or damaged needle.
Q: How often should I oil my Singer One? A: Refer to the lubrication guide in the manual; typically, oiling is recommended after every 8 hours of use.
Q: Where can I find replacement parts? A: Visit the Singer website or authorized Singer retailers. Always use genuine Singer parts for optimal performance. Q: What if my bobbin keeps jamming? A: Clean the bobbin case thoroughly and ensure the bobbin is wound correctly.
Lost your Singer sewing machine manual? Don’t stress! ManualCenterPDF.com has a huge collection of free Singer manuals. Get back to creating! ✨ **Singer sewing machine** help is here.